

The notification appears at the worst possible moment: “Your disk is almost full.” Maybe you’re about to save an important document, download a macOS update, or export a video project — and now your Mac is warning you that there’s almost no room left. Ignore it and things get worse quickly: apps start crashing, the beachball becomes your constant companion, and eventually macOS can’t even write temporary files, which can corrupt data and prevent your Mac from starting up properly.
Take a breath. A full disk is one of the most common Mac problems, and it’s almost always fixable within an hour — often within fifteen minutes — once you know where the space actually went. This guide walks you through the immediate actions to take right now, what to delete first for maximum impact, how to find what’s secretly eating your storage, and how to keep the warning from ever coming back. Along the way we’ll show how a free all-in-one tool like CleanMac compresses the whole emergency into a few clicks.
First: Check How Bad It Actually Is
Before deleting anything, get the facts. Click the Apple menu → System Settings → General → Storage (on older macOS versions: Apple menu → About This Mac → Storage). Wait for the colored bar to finish calculating — it can take a minute — and note two things:
- How much free space remains. Under 5 GB free is an emergency. Under 1 GB, your Mac is at genuine risk of misbehaving. Your goal is to get back above 15% of total capacity (about 38 GB on a 256 GB Mac, 75 GB on a 512 GB Mac).
- Which category is biggest. The bar breaks storage into color-coded categories: Applications, Documents, System Data (sometimes labeled “Other”), Photos, Mail, and so on. The biggest color tells you where to hunt first.
The category that surprises everyone is System Data — it’s common to see it balloon to 50–150 GB. We’ll come back to that, because it’s very fixable.
Immediate Actions: Reclaim Space in the Next 10 Minutes
If you’re in crisis mode, do these things in this order. Each takes seconds and frees space immediately.
1. Empty the Trash
Files in the Trash still occupy disk space — it’s the most commonly forgotten stash on any Mac. Right-click the Trash icon and choose Empty Trash. On a Mac that hasn’t been emptied in months, this alone can recover several gigabytes.
2. Clear your Downloads folder
Downloads is the default landing zone for every installer, ZIP, PDF, and attachment you’ve ever saved, and it grows without limit. Open it in Finder, sort by size (list view, Cmd+2, click the Size column), and delete or archive the big items. Old `.dmg` installers are pure waste — the apps are already installed.
3. Restart your Mac
A restart clears temporary files, purges old system caches, and removes leftover swap files. It’s not unusual to regain 2–10 GB simply by restarting a Mac that has been running (or sleeping) for weeks. Do this early — it’s free space with zero decisions required.
4. Delete local Time Machine snapshots
When your Time Machine backup drive isn’t connected, macOS keeps local snapshots on your startup disk as a safety net. They’re supposed to be purged automatically when space runs low, but they often linger and can consume tens of gigabytes. Open Terminal and run:
“`
tmutil listlocalsnapshots /
“`
To remove them, delete each snapshot with `sudo tmutil deletelocalsnapshots
What to Delete First: The Big Four
With the immediate moves done, it’s time for the real cleanup. Four categories account for the vast majority of reclaimable space on almost every full Mac. Work through them in this order — it’s arranged from safest and fastest to most thorough.
1. Junk files: caches, logs, and temporary data (5–15 GB typical)
Every app on your Mac writes cache files to speed itself up, and macOS itself generates logs, crash reports, and temporary files constantly. None of it is meant to be permanent, but almost none of it gets deleted automatically. Browser caches, chat app caches (WeChat and Slack are notorious), old iOS device backups in `~/Library/Application Support/MobileSync`, and years of accumulated app caches routinely add up to 5–15 GB.
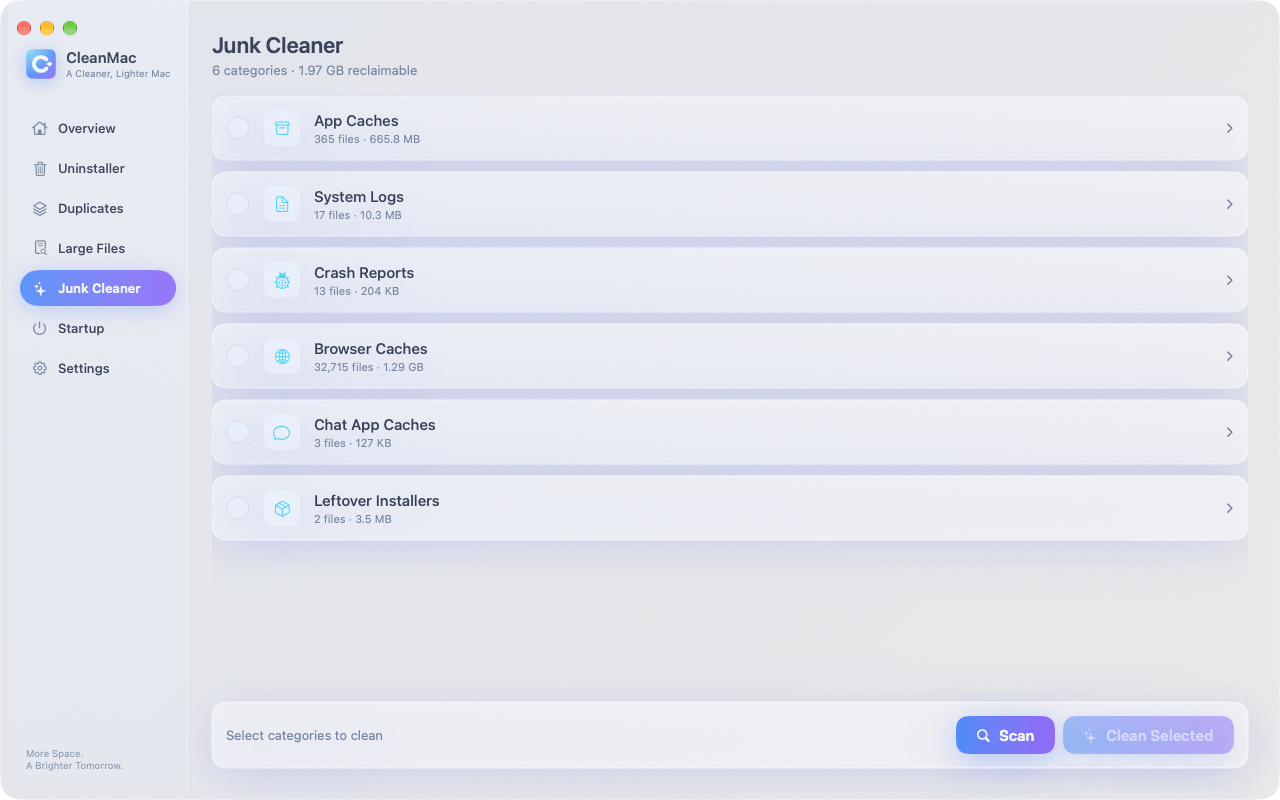
You can hunt these manually in `~/Library/Caches` — press Cmd+Shift+G in Finder and paste the path — but be careful to delete contents of cache folders, not the folders themselves, and skip anything you don’t recognize. The faster route is a dedicated junk cleaner: CleanMac scans app caches, system logs, crash reports, browser caches, and leftover installer packages in one pass, shows you a preview of exactly what it found, and moves your selections to the Trash — recoverable if anything misbehaves.
2. Large forgotten files (often 10–50 GB)
Almost every full disk hides a handful of enormous files the owner forgot about: a 4 GB screen recording from last year, a 20 GB virtual machine disk image, a downloaded movie, an exported video project, an old disk image (`.dmg`) of a backup. Individually each is “just one file” — together they’re often a third of the drive.
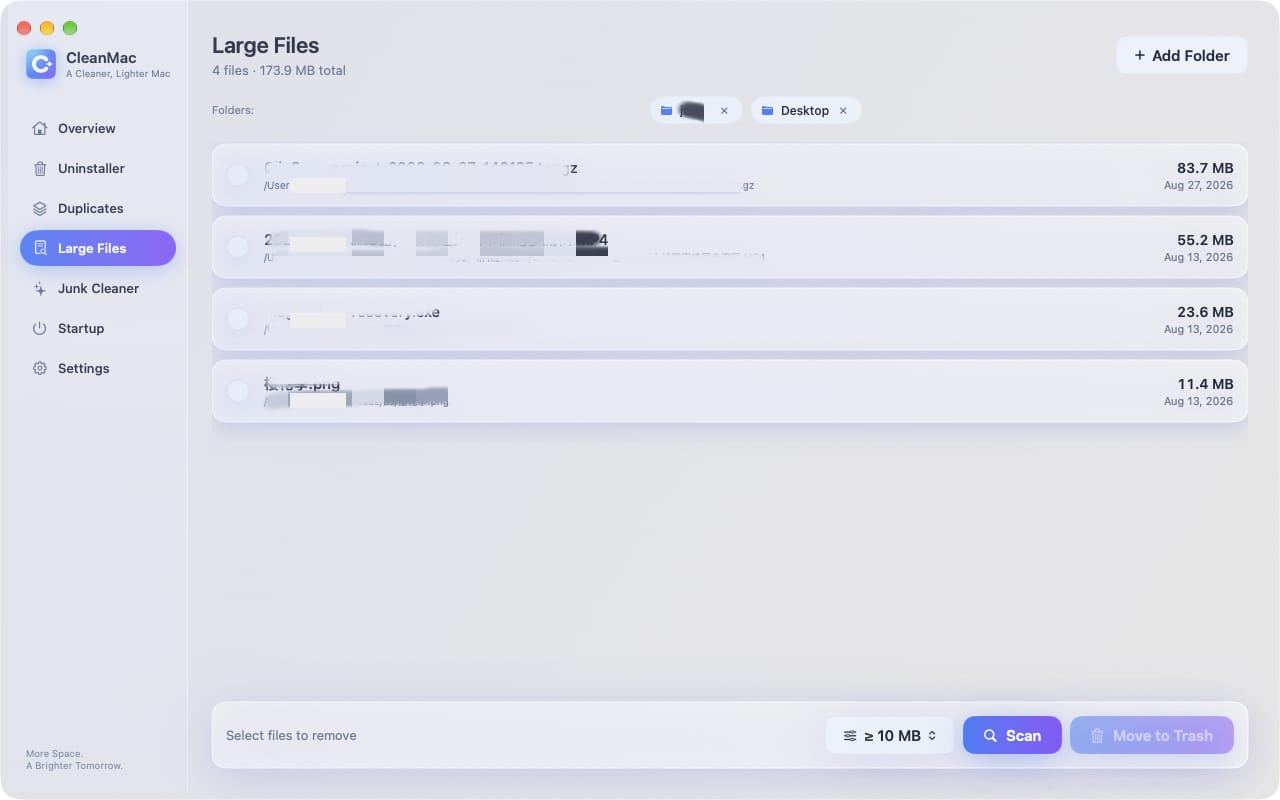
Finder can find them: open any Finder window, press Cmd+F, set the filter to File Size is greater than 1 GB, and set the search scope to This Mac. Sort by size and review. The catch is that Finder’s results include system files and files inside app bundles, so interpreting the list takes some care. CleanMac’s Large File Cleanup module does the same sweep but presents a clean, sorted list of files 10 MB and up from your user folders — the forgotten 6 GB video export practically highlights itself. Preview each file before deleting; everything goes to the Trash.
3. Duplicate files (5–15 GB typical)
If you’ve ever imported the same photos twice, re-downloaded a file you already had, or kept “backup copies” of folders on the same drive, you’re carrying duplicates. Photos and downloads are the worst offenders. macOS has no built-in way to find them across folders — the Photos app’s Duplicates album only covers its own library.
A content-based duplicate finder solves this properly: it compares files by their actual contents (a hash), so it matches duplicates even when they have different names, and it never groups files that merely look similar. CleanMac’s Duplicates module does exactly this, groups identical files for side-by-side preview, and always keeps one copy safe — you remove only the redundant extras, sent to the Trash.
4. Applications you don’t use (varies widely)
Games, creative tools, and pro apps are the heavyweights — a single game can be 50–100 GB, and creative suites run 2–8 GB per app. Sort your Applications folder by size and ask the honest question for each of the big ones: have I opened this in the last 90 days?
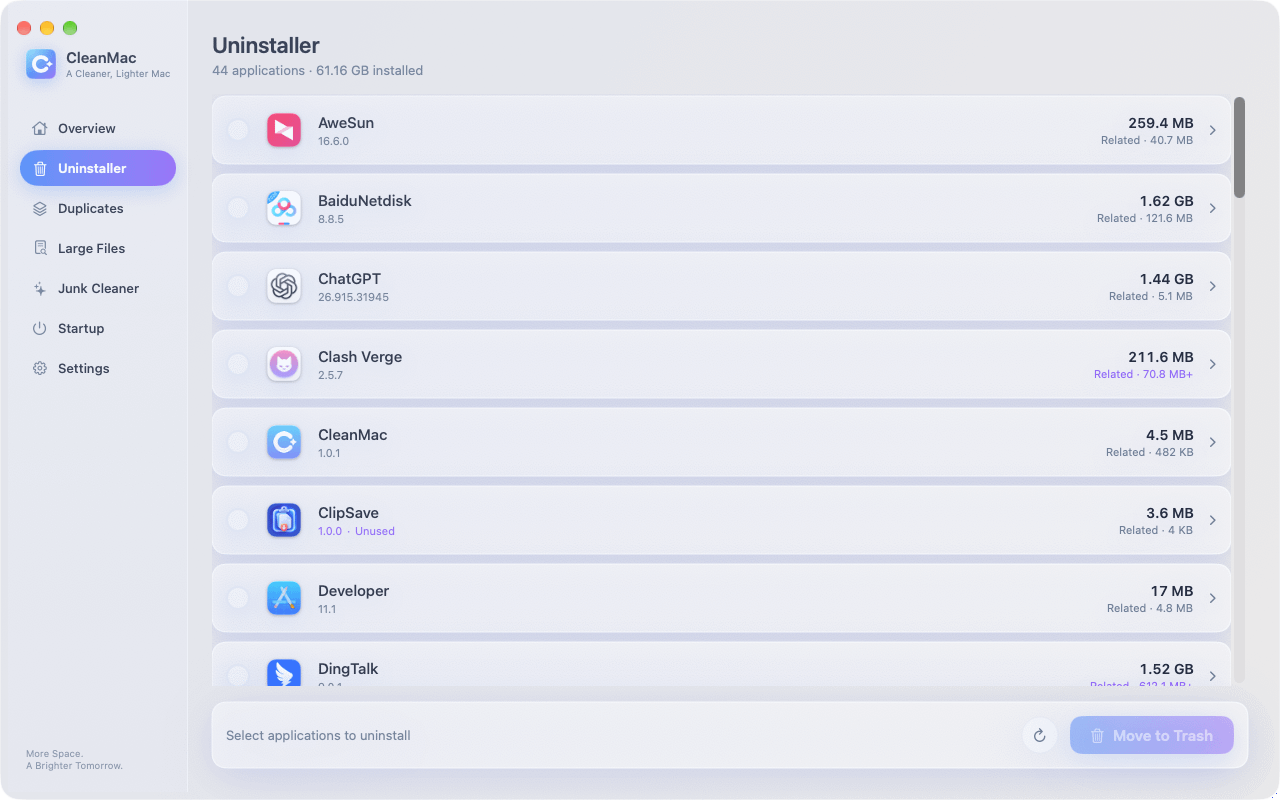
Crucially, don’t just drag apps to the Trash — that leaves their caches, preferences, containers, and support files behind, sometimes gigabytes of them. A proper uninstaller removes the app together with all its leftovers. CleanMac’s Uninstaller module lists every app by total footprint (app plus leftovers), flags apps unused for 30+ days, and removes everything in one action — including the stubborn remnants a drag-to-trash always misses.
What Is “System Data” (or “Other”) and Why Is It So Huge?
The System Data category in the Storage bar confuses everyone, because it’s a catch-all for everything that isn’t obviously a document, app, or photo. When it balloons to 100+ GB, here’s what’s usually inside:
- System and app caches — the junk files covered above
- Time Machine local snapshots — covered in the emergency steps
- iOS/iPadOS device backups — old iPhone backups stored in `~/Library/Application Support/MobileSync/Backup`; each can be 10–60 GB. Delete outdated ones in Finder (connect the device, select it, Manage Backups) or directly from that folder.
- Mail attachments and message caches
- Swap files and sleep images — virtual memory data; a restart trims these
- App support data — virtual machine disks, game assets, Xcode simulators and derived data (developers: check `~/Library/Developer`, which can easily hold 30+ GB)
- Browser and chat app data — cached media from months of messages
The important insight: most of System Data is not “the system” at all — it’s accumulated app data, and most of it is safely removable with the techniques above. A full pass through junk, large files, duplicates, and unused apps typically shrinks System Data dramatically without touching anything macOS actually needs.
The All-in-One Fix: CleanMac as Your Emergency Toolkit
Everything described above — the junk sweep, the large-file hunt, the duplicate scan, the proper app uninstalls — is what CleanMac does in a single free app. For a disk-full emergency, the workflow is:
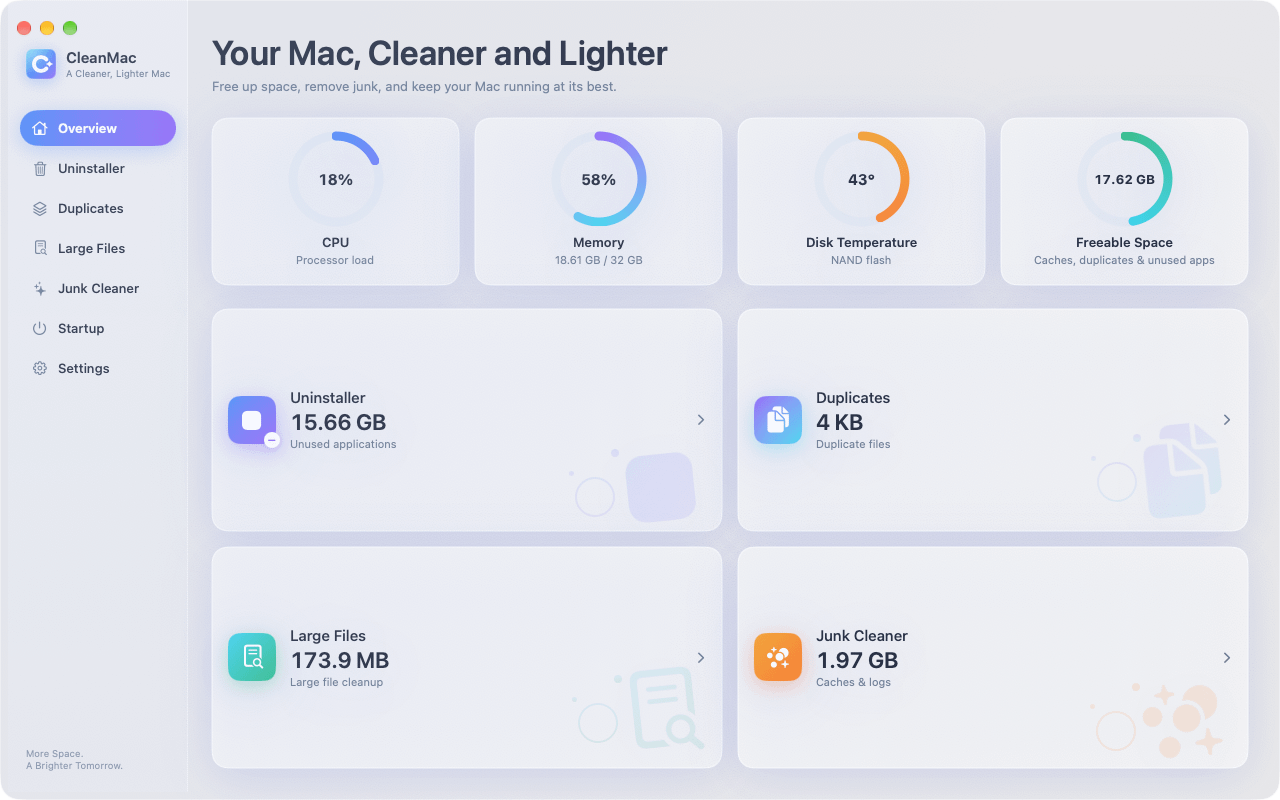
- Start at the Overview dashboard — it shows live CPU, memory, disk temperature, and exactly how much space is freeable right now, so you know your starting point.
- Run Junk Cleaner first — fastest wins, zero risk, preview everything before cleaning.
- Run Large File Cleanup — sort by size, evict the forgotten monsters.
- Run Duplicates — keep one copy of everything, remove the rest.
- Run Uninstaller — sort by footprint, batch-remove the apps you haven’t touched in months, leftovers included.
- Check Startup Items while you’re here — not a space fix, but a full disk and a bloated login sequence usually travel together.
Every module previews before deleting, everything goes to the Trash rather than permanent erasure, and all scanning runs locally on your Mac — no account, no uploads. CleanMac requires macOS 13 Ventura or later and is free with no trial or subscription. Download CleanMac free and a realistic first session recovers 15–40 GB in under half an hour.
Prevention: Never See That Warning Again
Emergency cleanup fixes today’s crisis; a few habits prevent next month’s:
- Keep 15% free at all times. Below that, performance degrades and macOS starts complaining. Check storage monthly in System Settings → General → Storage.
- Empty the Trash weekly — or turn on Finder’s “Remove items from the Trash after 30 days” (Finder → Settings → Advanced).
- Treat Downloads as a staging area, not storage. File it or delete it; never let it accumulate.
- Offload what you don’t need locally. Photos libraries, video archives, and old projects belong on an external drive or in cloud storage, not on a 256 GB startup disk.
- Delete old iPhone backups after you get a new device — they outlive their usefulness by years.
- Run a maintenance scan monthly. Ten minutes with a cleaner once a month beats a panicked hour once a year.
- Uninstall apps properly the first time so leftovers never accumulate.
Conclusion
“Your disk is almost full” feels like an emergency because it arrives without warning — but the fix is systematic, not mysterious. Empty the Trash, clear Downloads, and restart for instant relief; then work through the big four — junk files, large files, duplicates, and unused apps — to do the real recovery. Most Macs reclaim 15–40 GB in a single session, and the mysterious “System Data” blob shrinks right along with them.
If you want the whole job done in one place, CleanMac bundles every step — junk cleaner, large file finder, duplicate scanner, full uninstaller, startup manager, and a live storage dashboard — into one free, local, preview-first app. Get back above 15% free, adopt the monthly maintenance habit, and you’ll never see that warning again. For more hand-picked Mac utilities, browse our app collection.
Frequently Asked Questions
Why does my Mac say the disk is almost full when I don’t have many files?
Because the space usually isn’t in your visible files — it’s in hidden accumulation: app caches, system logs, Time Machine local snapshots, old iPhone backups, Mail attachments, and app support data like virtual machine disks. All of this lands in the “System Data” category, which often grows to 50–150 GB without any deliberate action on your part. Check System Settings → General → Storage to see the breakdown, then work through junk files and large files to find the real occupants.
Is it safe to delete files when my disk is full?
Yes, as long as you follow two rules: only delete things you can identify (your own documents, downloads, app caches, duplicates, and apps you no longer use), and delete to the Trash rather than permanently so everything is recoverable. Never delete files inside `/System` or random items in `/Library` that you can’t attribute to a specific app. Tools that preview before deleting — like CleanMac — add a second layer of safety by showing you exactly what will go before anything happens.
What is “Other” or “System Data” storage on Mac?
It’s a catch-all category for everything that isn’t clearly a document, app, photo, or system file: caches, logs, crash reports, iOS backups, Mail data, browser caches, virtual machine disks, and temporary files. Despite the name, most of it is app data, not macOS itself — and most of it is safely removable. Cleaning junk files, deleting old device backups, and restarting to clear swap files typically shrinks it substantially.
How much free space should I keep on my Mac?
Aim for at least 15% of your total capacity free — roughly 38 GB on a 256 GB Mac or 75 GB on a 512 GB Mac. Below about 10%, macOS struggles to manage virtual memory and temporary files, and you’ll notice slowdowns, app crashes, and update failures. If you routinely work with large video files or virtual machines, give yourself even more headroom, since those workloads consume tens of gigabytes of temporary space while running.
Can I delete Time Machine local snapshots to free up space?
Yes — they’re designed to be disposable. Local snapshots exist to protect you when your backup drive is disconnected, and macOS is supposed to purge them automatically when space runs low, but they often linger. You can list them in Terminal with `tmutil listlocalsnapshots /` and remove them with `sudo tmutil deletelocalsnapshots` followed by the snapshot’s date. Freeing space through normal cleanup also triggers macOS to reclaim them on its own.
Why did my disk fill up again right after I cleaned it?
Something is actively writing data — the usual suspects are a sync client stuck in a loop, an app generating runaway logs, a browser caching aggressively, or a background process like Spotlight or Photos doing a one-time re-index after a macOS update. Restart first; if the space keeps vanishing, open Activity Monitor and check the Disk tab to see which process is writing heavily, then investigate that app specifically.
Will deleting caches and junk files break my apps?
No. Caches exist to make apps faster, not to store anything irreplaceable — when you delete an app’s cache, it simply rebuilds what it needs on next launch (which may make that first launch slightly slower). Logs and crash reports are diagnostic records, not working data. The data that matters — your documents, settings, and saved content — lives elsewhere, and a reputable junk cleaner only targets the categories that are designed to be disposable.


