

When your Mac warns that the disk is almost full, the culprit is rarely thousands of small files — it’s usually a handful of enormous ones you’ve forgotten about. A 20 GB virtual machine from a project that ended last year. A 4K screen recording you exported once and never watched again. An iOS backup of a phone you no longer own. Finding these space hogs is the single fastest way to reclaim serious storage, and this guide shows you every method: the built-in Finder and System Settings approaches, what actually counts as a “large file,” how to decide what’s safe to delete, and how a free tool like CleanMac surfaces every file over 10 MB in one sorted scan.
What Counts as a “Large File” on Mac?
There’s no official Apple definition, but in practical storage-recovery terms, a useful threshold is 100 MB — big enough that deleting a handful of them makes a visible dent, small enough that the list stays manageable. On most Macs, the files that really matter fall into predictable categories:
- Video files. Screen recordings, 4K iPhone footage, and exported project files routinely run 1–20 GB each. An hour of 4K/60fps iPhone video is roughly 24 GB.
- Disk images and archives. `.dmg` installers, `.zip` backups, and `.iso` files. The installer you used once two years ago is still sitting in Downloads.
- Virtual machines. Parallels, VMware, and UTM virtual disks commonly occupy 20–80 GB each and grow over time.
- iOS device backups. Each iPhone or iPad backup in `~/Library/Application Support/MobileSync/Backup/` can be 10–60 GB.
- Photo and music libraries. A mature Photos library often exceeds 50 GB; so does a downloaded Apple Music collection.
- Game data and developer tools. Steam libraries, Xcode simulators, and Docker images are notorious multi-gigabyte residents.
The pattern that matters: on a typical full Mac, the largest 50 files often account for 30–50% of all used storage. That’s why large-file hunting beats every other cleanup method for immediate results — you’re moving gigabytes per decision instead of megabytes.
Method 1: Find Large Files with Finder (Free, Built-In)
Finder has a hidden but genuinely powerful large-file search. It takes a minute to set up and costs nothing.
- Open any Finder window and press Cmd+F (or choose File → Find).
- Set the search scope at the top to “This Mac.”
- In the first criteria row, change the filter to File Size. (If you don’t see it, click the dropdown → Other, search for “File Size,” and check it.)
- Set the condition to is greater than and enter 500 MB as a starting point.
- Click the Kind column header or sort results by Size descending.
Now you’re looking at every file on your Mac above half a gigabyte, biggest first. From here:
- Select any file and press Space to Quick Look it before deciding.
- Right-click → Show in Enclosing Folder to see where it lives — context often tells you whether it’s safe to remove.
- Lower the threshold to 100 MB for a second pass once the giants are handled.
The limitations: Finder’s search only shows files indexed in locations you have permission to see, it can’t group results by category (all videos, all disk images), and it won’t warn you that the 30 GB “file” you’re about to delete is actually your only Photos library backup. It’s a flashlight, not a strategy — powerful, but you supply the judgment.
Method 2: Check Storage in System Settings
macOS has its own answer to “what is taking up space on my Mac,” and it’s worth a look before you go file hunting:
- Open System Settings → General → Storage (on older macOS: Apple menu → About This Mac → Storage → Manage).
- Wait for the colored bar to finish calculating — it breaks usage into categories: Applications, Documents, Photos, System Data, and more.
- Click the i next to any category to drill in. The Documents category is the useful one here: it has a Large Files tab listing your biggest files with sizes and last-opened dates.
This view is genuinely helpful for a quick audit, and the “last opened” column is great for spotting files you haven’t touched in years. Its weakness is the opposite of Finder’s: it shows you what but gives you no tools for where — no path column, no bulk selection, and categories like “System Data” remain an opaque blob that can hide tens of gigabytes.
Method 3: The Fast Way — CleanMac’s Large File Cleanup
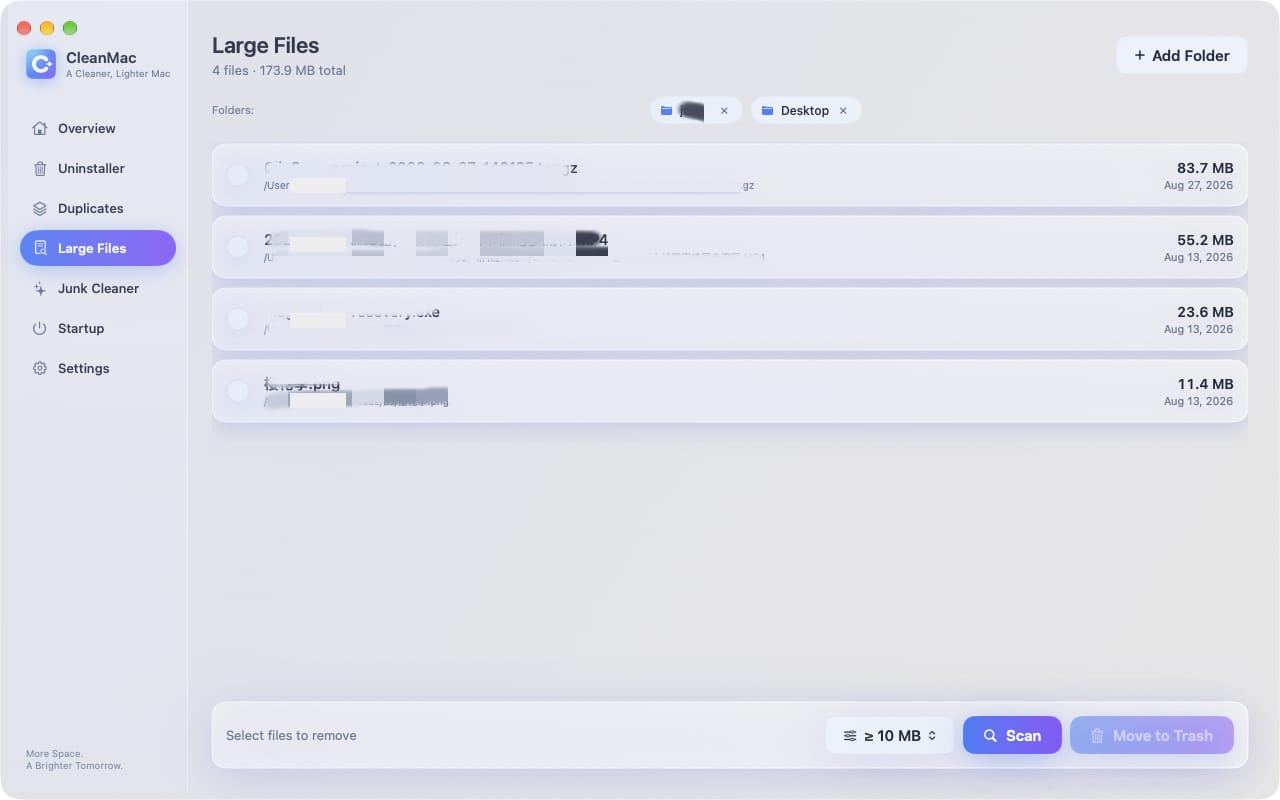
If you’d rather skip the manual archaeology, CleanMac includes a dedicated Large File Cleanup module — one of six free tools in the app — built exactly for this job.
The workflow:
- Open CleanMac and choose Large File Cleanup.
- Click scan. It sweeps your entire drive and lists every file 10 MB or larger, sorted by size descending.
- Adjust the size filter upward (50 MB, 100 MB, 500 MB) if you only want the heavyweights, or filter by file type to isolate videos, archives, or disk images.
- Preview any file in place, select the ones you want gone, and confirm. Files move to the Trash — never permanent deletion — so everything is recoverable until you empty it.
The difference from the built-in methods is the complete picture: Finder makes you run separate searches at different thresholds, and System Settings hides paths, while CleanMac gives you one unified, sorted, filterable list of everything worth a decision. On a well-used Mac, the first scan typically surfaces 20–60 GB of files above 100 MB — and most people find at least a few gigabytes they can delete in the first minute.
Trust matters with any tool that reads your whole drive, so the details: CleanMac scans locally only — no account, no uploads, nothing leaves your Mac. It requires macOS 13 Ventura or later, runs natively on Intel and Apple Silicon, and is available in 11 languages. Download CleanMac free.
What to Keep vs. What to Delete
A sorted list of big files is only half the job — the other half is judgment. Here’s a practical decision framework.
Usually safe to delete:
- Old `.dmg` and `.pkg` installers — the apps are already installed; re-download if ever needed
- Exports and renders of projects you still have the source for
- Duplicate downloads (`file (1).zip`, `file (2).zip`)
- iOS backups for devices you no longer own
- Screen recordings and Zoom recordings you’ve already shared
- Old virtual machines from finished projects
Think twice (verify first):
- Photos, Photos libraries, and raw footage — irreplaceable; back up externally before deleting
- Current virtual machines you still use — compact them instead of deleting
- Anything inside `~/Library` you don’t recognize — some large files there are active app data
- Disk images whose contents you’ve never checked — mount them (double-click) and look first
Never touch:
- Anything under `/System` — macOS owns it
- Your only copy of anything — the rule of large-file deletion is backup first, delete second for anything irreplaceable
A good habit for the “think twice” pile: move candidates to a single “To Review” folder on an external drive instead of deleting outright. If nothing breaks and you haven’t missed them in a month, delete the folder.
Where Large Files Usually Hide
Certain folders account for the overwhelming majority of large-file discoveries. Check these first whether you’re searching manually or reviewing scan results:
| Location | What accumulates there |
|---|---|
| `~/Downloads` | Installers, archives, repeated downloads |
| `~/Movies` | Screen recordings, exported video |
| `~/Library/Application Support/MobileSync/Backup/` | iOS device backups |
| `~/Library/Developer/` | Xcode simulators, derived data (often 20+ GB) |
| `~/Library/Containers/` and `~/Library/Group Containers/` | App data, sometimes multi-GB caches misfiled as data |
| External-drive backup folders | Forgotten manual backups |
| `~/Virtual Machines.localized/` or `~/Documents/Virtual Machines/` | VM disks |
The lesson from the table: large files concentrate. You rarely need to search your whole drive by hand — five folders usually hold 80% of the reclaimable space.
Beyond Large Files: Finish the Job
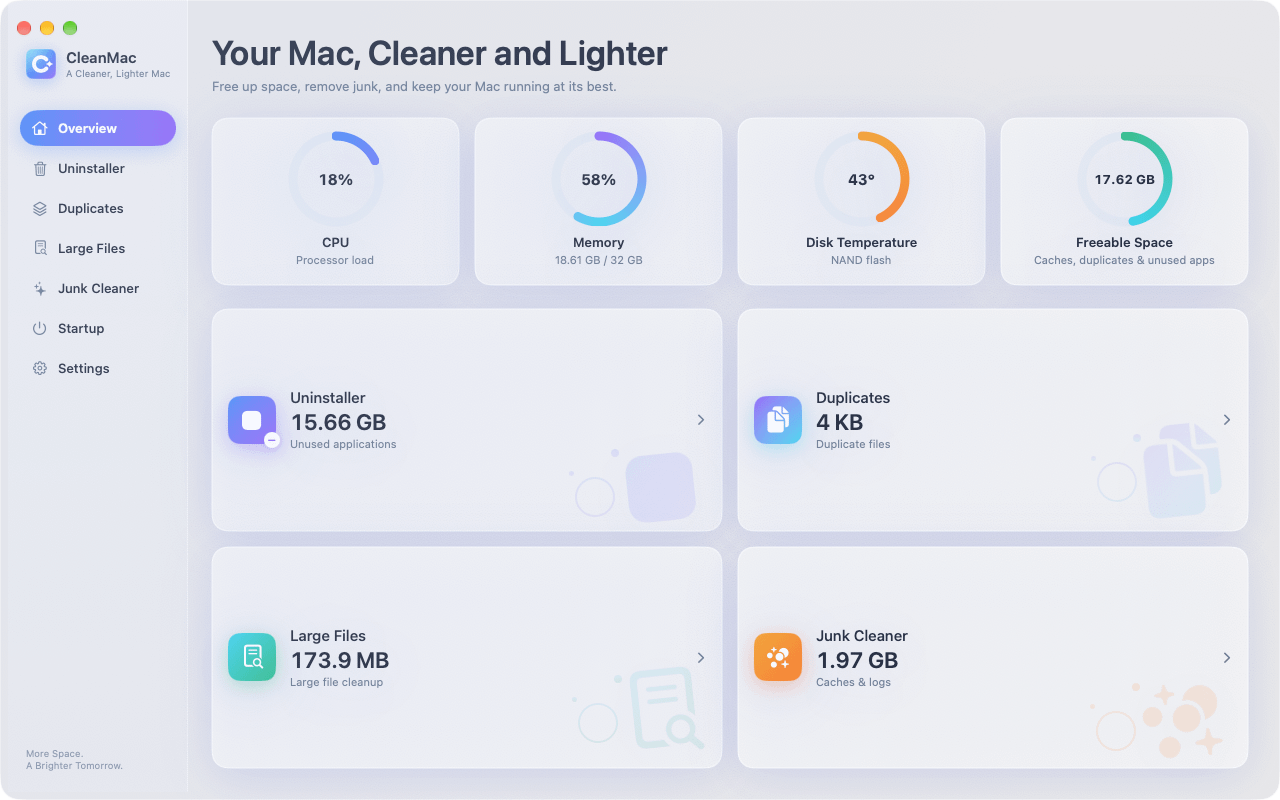
Large files give you the biggest wins, but a full storage recovery usually involves three neighbors — all in the same free app:
- Duplicate files. That 2 GB video might exist twice. CleanMac’s Duplicates module matches files by content, not name, and always keeps one copy safe.
- Junk files. Caches, logs, and crash reports rarely include huge single files, but collectively they hold 5–15 GB. The Junk Cleaner module sweeps them in one pass.
- Unused applications. Apps you haven’t opened in months are large files with extra steps. The Uninstaller module removes apps with their support files and flags anything unused for 30+ days.
If you’re doing a deep clean, run them in that order: large files for the dramatic win, duplicates for the hidden waste, junk for the long tail.
Conclusion
Answering “what is taking up space on my Mac” almost always ends at the same place: a short list of very large files, most of them forgotten, many of them deletable. Finder’s size search and the Storage panel in System Settings will get you there with patience — but a dedicated scanner like CleanMac’s free Large File Cleanup turns an afternoon of digging into a five-minute review of one sorted list.
Whichever method you choose, follow the two rules: verify before you delete anything irreplaceable, and delete to the Trash rather than permanently. Your future self — the one with 40 GB of free space — will thank you. For more hand-picked free Mac utilities, browse our app collection.
Frequently Asked Questions
How do I find the largest files on my Mac quickly?
The fastest built-in method is Finder: press Cmd+F, set the scope to “This Mac,” add a File Size filter for “is greater than 500 MB,” and sort by size. For a complete picture, a scanner like CleanMac lists every file above 10 MB in one sorted view, which usually surfaces tens of gigabytes of candidates in under a minute.
What is taking up space on my Mac?
Check System Settings → General → Storage for a category-level breakdown of your disk. On most Macs the answer is a combination of photos and videos, applications, iOS backups, and the opaque “System Data” category — which itself is mostly caches, logs, and snapshots. Large individual files in Downloads, Movies, and backup folders are usually the biggest single contributors.
Is it safe to delete large files found in ~/Library?
Sometimes, but verify first. Folders like `MobileSync/Backup` (old iOS backups) and `Developer` (Xcode data) are commonly safe to clear, while files inside `Application Support` and `Containers` may be live app data. When you can’t identify a file, leave it alone or research its name before deleting — and always delete to the Trash, not permanently.
How big does a file need to be to count as “large”?
For cleanup purposes, 100 MB is a practical threshold — large enough that deleting a few files frees visible space, small enough to keep the list manageable. Video files, virtual machines, and device backups run into the gigabytes, while a 10–50 MB floor is useful for catching smaller archives and installers during a thorough sweep.
Why doesn’t Finder’s search show all my large files?
Finder search respects indexing settings and permissions, so files in excluded folders, on unindexed external drives, or inside some system locations won’t appear. Files stored inside app packages and library containers can also be invisible to a plain size search. A dedicated scanner reads the filesystem directly and shows everything you have permission to see.
Should I delete old iPhone backups from my Mac?
Backups of devices you no longer own are safe to delete and often free 10–60 GB each. For your current device, keep at least the most recent backup — or confirm you have an up-to-date iCloud backup — before removing local copies. You can manage them in Finder by selecting your device, or directly in `~/Library/Application Support/MobileSync/Backup/`.
Can I recover a large file after deleting it?
If it was moved to the Trash, yes — open the Trash and drag it back, as long as you haven’t emptied it. After the Trash is emptied, recovery depends on whether the disk sectors have been overwritten, so stop using the drive immediately and try a data recovery tool or restore from a Time Machine backup. This is why Trash-based deletion, which CleanMac uses by design, is the safe default for any cleanup.


