
Selling or giving away your Mac without preparing it properly is like handing a stranger your wallet along with the keys to your house. Your Mac holds saved passwords, banking sessions, private messages, photos, tax documents, and enough cached account data to reconstruct your digital life — and simply dragging files to the Trash doesn’t remove any of it. A proper pre-sale cleanup has three jobs: protect your data by backing it up, protect your privacy by wiping every trace of yourself, and hand over a Mac that feels factory-fresh to its new owner.
This guide walks through the complete process in the right order: backup first, sign out of everything, deep-clean personal data with a free tool like CleanMac, then erase and reinstall macOS for the final reset. Follow every step — the order matters.
Before You Touch Anything: Back Up Your Mac
Everything after this section is irreversible, so the first step is making sure you can undo all of it.
Time Machine is the easiest option: connect an external drive, go to System Settings → General → Time Machine, and run a full backup. When your new Mac arrives, Migration Assistant can restore everything from this backup — apps, files, settings, all of it.
Verify the backup before proceeding. This is the step everyone skips and some people regret. Open Time Machine, browse to a few recent and a few old files, and confirm they open. If you’re migrating to a new Mac soon, you can also wait and migrate first, then wipe the old Mac only after the new one is confirmed working — the safest sequence of all.
Don’t forget the odd corners: export your Photos library if it’s not fully in iCloud, note down software license keys and serial numbers (1Password, Little Snitch, and similar apps store them locally), and export browser bookmarks if you don’t use sync. Deauthorizing apps with per-machine licenses — iTunes/Music, Ableton, Adobe — is easier while you can still sign in.
Sign Out of Every Account
Erasing a Mac that’s still signed into your accounts creates two problems: your data may linger in sync services, and Activation Lock can turn the Mac into an expensive paperweight for its new owner. Sign out of everything while the machine is still fully functional.
Apple Account (the critical one)
Go to System Settings → your name → Sign Out. This single action disables Find My Mac and removes Activation Lock — skip it, and the buyer will be staring at a lock screen demanding your password, which is the number-one cause of returned Macs and angry marketplace disputes. During sign-out, macOS will ask whether to keep copies of iCloud data locally; say no — you’re about to erase everything anyway.
Then remove the Mac from your trusted devices: on another device or at appleid.apple.com, check your device list and remove this Mac if it still appears after sign-out.
The rest of the list
- Messages and FaceTime: open each app → Settings → sign out (they use your Apple Account but sometimes hold separate sessions)
- Music/TV/Podcasts: Account → Sign Out, and check Account → Authorizations → Deauthorize This Computer if you ever authorized iTunes purchases
- Browsers: sign out of Chrome/Firefox/Edge profiles so synced passwords disconnect; Safari sign-out happens with the Apple Account
- Third-party accounts: Slack, Dropbox, Google Drive, OneDrive, Steam, and any VPN client — sign out or disconnect each
- Bluetooth devices: unpair your keyboard, mouse, and AirPods (System Settings → Bluetooth) so they don’t auto-connect to the new owner’s setup
Clean Your Personal Data Thoroughly
Signing out disconnects your accounts, but it doesn’t remove the residue: browser caches full of your browsing history, chat app media, downloaded files, old documents, app leftovers, and logs recording years of activity. Before the final erase, it’s worth doing a real cleanup — both to see with your own eyes what’s being removed, and because some sellers prefer to delete sensitive data themselves rather than trust the erase alone.
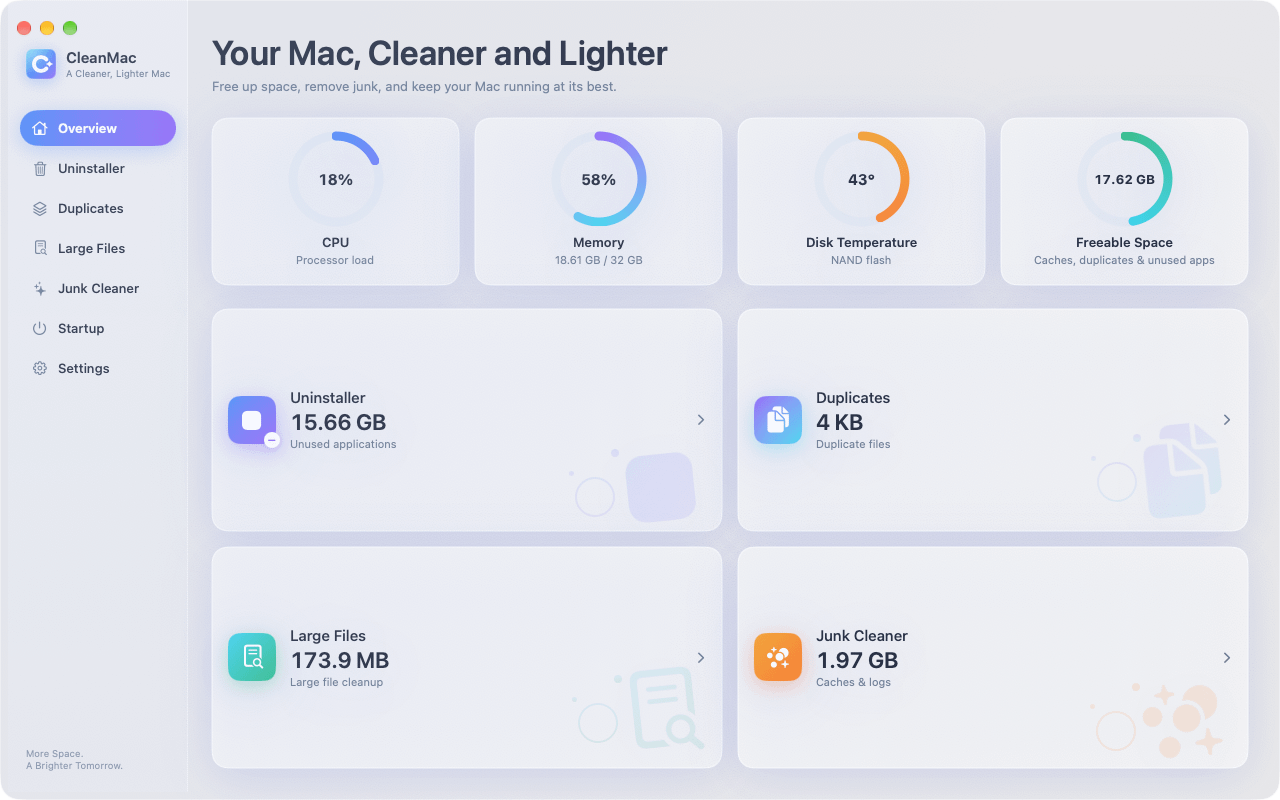
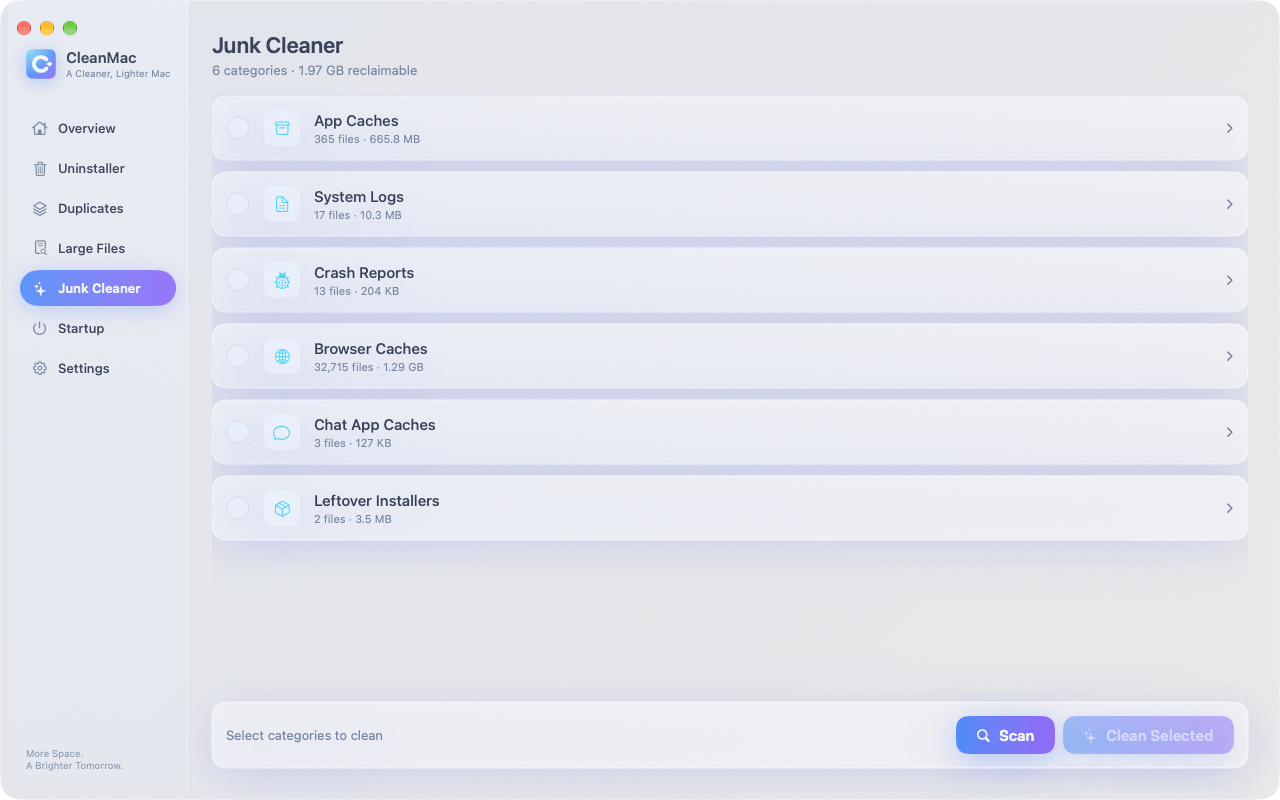
This is where CleanMac earns its place in the process. It’s free, runs entirely locally (no account, no uploads — important when the whole point is privacy), and its six modules map neatly onto a pre-sale checklist:
- Junk Cleaner — sweeps browser caches, app caches, logs, and crash reports. This is where your browsing history and activity traces actually live.
- Uninstaller — removes apps with their support files and leftover data, not just the app icon. Uninstall everything personal: chat apps, password managers, work tools, banking apps.
- Large File Cleanup — lists every file above 10 MB so nothing personal hides in a forgotten corner: old exports, tax PDFs, downloaded statements.
- Duplicates — catches the second copies of documents and photos you forgot existed.
Work through them in that order, then manually check the remaining personal folders: Documents, Desktop, Downloads, Pictures, Movies. Empty the Trash when done.
Two important notes. First, everything CleanMac deletes goes to the Trash, so nothing is permanent until you empty it — a safety net while you’re still deciding. Second, CleanMac requires macOS 13 Ventura or later and runs natively on both Intel and Apple Silicon. Download CleanMac free.
A word about FileVault
If it isn’t already on, turn on FileVault (System Settings → Privacy & Security → FileVault) and let it finish encrypting before you erase. This sounds backwards — why encrypt a disk you’re about to wipe? Because on an encrypted drive, erasing is cryptographically instant and total: destroying the encryption key makes every leftover bit of your old data permanently unreadable, even to forensic recovery tools. On Apple Silicon and T2 Macs the internal storage is always encrypted at rest, but FileVault ties the keys to your user credentials — enable it for the clean guarantee.
Erase the Mac and Reinstall macOS
Now the reset itself. The method depends on your Mac’s age.
Modern Macs: Erase All Content and Settings
On Apple Silicon Macs and Intel Macs with the T2 chip running macOS Monterey or later, Apple built in an iPhone-style erase:
- System Settings → General → Transfer or Reset → Erase All Content and Settings.
- Enter your admin password and confirm.
- The Mac signs out of Apple services, wipes all user data and settings, and restarts to the setup assistant — the same “Hello” screen the buyer will see on a brand-new Mac.
This takes a few minutes and leaves the current macOS installation intact, so the new owner can set it up immediately. This is the option you want on any Mac that offers it.
Older Macs: Recovery Mode erase
On Macs without Erase All Content and Settings:
- Intel Mac: restart and hold Cmd+R until the Apple logo appears. (Apple Silicon: shut down, then press and hold the power button until “Loading startup options” appears, then choose Options → Continue.)
- In macOS Recovery, open Disk Utility.
- Select the internal volume (usually “Macintosh HD”), click Erase, choose APFS format and GUID Partition Map, and confirm.
- Quit Disk Utility and choose Reinstall macOS from the Recovery menu. Follow the prompts — the Mac downloads a fresh copy of macOS, which takes 30–60 minutes depending on your connection.
- When installation finishes and the setup assistant appears, press Cmd+Q and shut down. Do not set it up — the new owner should walk through setup themselves.
Physical Cleaning and Handover Prep
A clean Mac sells faster and for more money, and this part takes ten minutes:
- Power off and unplug. Wipe the exterior with a soft, slightly damp lint-free cloth — no liquids in openings, no aerosol sprays directly on the machine.
- Screen: use a dry or barely-damp microfiber cloth. Never use window cleaner; the coatings on Mac displays are delicate.
- Keyboard and ports: hold the Mac at an angle and use compressed air in short bursts to clear crumbs and dust.
- Gather the extras: the original box, charger, and cables meaningfully increase resale value. Include them if you have them.
- Write down the specs: buyers ask. Apple menu → About This Mac gives you the chip, memory, and storage; the serial number for the listing is right there too.
Take your listing photos after this cleanup, in good light — it makes a visible difference.
The Complete Pre-Sale Checklist
In order, one more time:
- Back up with Time Machine and verify the backup
- Migrate to your new Mac first if possible
- Deauthorize licensed apps (Music, Adobe, etc.)
- Sign out of your Apple Account (disables Find My and Activation Lock)
- Sign out of Messages, FaceTime, browsers, and third-party apps
- Unpair Bluetooth devices
- Turn on FileVault and let encryption complete
- Deep-clean personal data — CleanMac’s free modules cover caches, apps, large files, and duplicates
- Manually check Documents, Desktop, Downloads, Pictures, Movies; empty the Trash
- Erase All Content and Settings (or Recovery-mode erase + reinstall on older Macs)
- Stop at the setup assistant — don’t configure anything
- Physically clean the Mac and gather the box and charger
Conclusion
Preparing a Mac for sale is really two jobs: making sure you lose nothing, and making sure the new owner gets nothing of yours. Back up and verify first, sign out of everything — especially the Apple Account, which controls Activation Lock — clean out your personal data where you can see it happening, then let Apple’s own erase do the final wipe. Done in this order, the whole process takes an afternoon and ends with a Mac that’s genuinely factory-fresh and a seller who’s genuinely protected.
For more free Mac utilities worth installing on your new machine, browse our app collection.
Frequently Asked Questions
Is factory reset enough before selling my Mac?
Erase All Content and Settings (or a Recovery-mode erase and reinstall) is the essential final step, and on a FileVault-encrypted drive it renders old data unrecoverable. But a reset alone skips the steps that protect you — backing up, signing out of accounts, and disabling Activation Lock — so the full checklist matters, not just the erase.
Do I need to sign out of iCloud before erasing my Mac?
Yes, absolutely. Signing out of your Apple Account in System Settings disables Find My Mac and removes Activation Lock, which otherwise stays attached to your account even after erasure. If you skip this, the buyer will be blocked at setup by a screen demanding your Apple Account password — the most common cause of Mac sale disputes.
Will the buyer be able to recover my deleted files?
Not if you follow the full process. Enabling FileVault before erasing means the wipe destroys the encryption keys, making previously stored data cryptographically unrecoverable. Deleting files to the Trash and then erasing an encrypted drive provides two independent layers of protection, which is why the order of steps in this guide matters.
Should I clean my Mac with software before erasing it?
It isn’t strictly required if you erase properly, but many sellers prefer it — deleting personal data yourself, with a preview of exactly what’s being removed, is more reassuring than trusting a black-box erase. A free tool like CleanMac also helps you find forgotten personal files (old backups, exported documents, downloads) that you might want to save before the wipe.
What’s the difference between Erase All Content and Settings and reinstalling macOS?
Erase All Content and Settings wipes your data and settings while keeping the current macOS in place — the fastest path, available on Apple Silicon and T2-chip Macs. The Recovery-mode method erases the disk and reinstalls macOS from scratch, which is the fallback for older Intel Macs. Both end at the same place: a setup assistant ready for the new owner.
Can I sell my Mac without the original charger and box?
You can, but expect a noticeably lower price — typically 10–15% less without the charger, since buyers have to source one themselves. The original box matters less but adds to perceived care. If you’re missing the charger, say so clearly in the listing and price accordingly rather than surprising the buyer.
How do I check my Mac’s specs and serial number for the listing?
Click the Apple menu → About This Mac for the chip or processor, memory, and storage capacity, and note the model year shown there. The serial number appears in the same window — you can also check coverage status at Apple’s checkcoverage page, which buyers often ask about. Screenshot the window and you’ll have everything a listing needs.


